Optimizacija i ubrzavanje bloga uz pomoć Geo DNS i reverznih proksija
 digitalocean image
Vikend eksperiment jeste postavljanje više PoP (Point of Presence. Više na https://www.cachefly.com/news/why-points-of-presence-pops-are-pivotal-for-optimal-cdn-performance/) servera kako bi lag/kašnjenje bilo manje.
Koristio sam gotove servise: EasyDNS i Linode Cloud.
EasyDNS nudi GeoDNS za 9$ mjesečno. Moguće je prema geografskoj lokaciji odrediti koji DNS zapis tj povratni odgovor na DNS upit (od A recorda pa dalje).
Sa Linodom je moguće "kopirati" na više lokacija širom svijeta (paralelno) kada se sredi prvi box/server.
Linode mjenja IP adresu servera koji se klonira a sve ostalo ostaje kako jeste (config, šifre, ključevi, SSL sertifikati, ostalo)
Tako da podesimo 1 server i uradimo kloniranje na više mjesta i samim tim napravimo PoP (https://www.cachefly.com/news/why-points-of-presence-pops-are-pivotal-for-optimal-cdn-performance/)
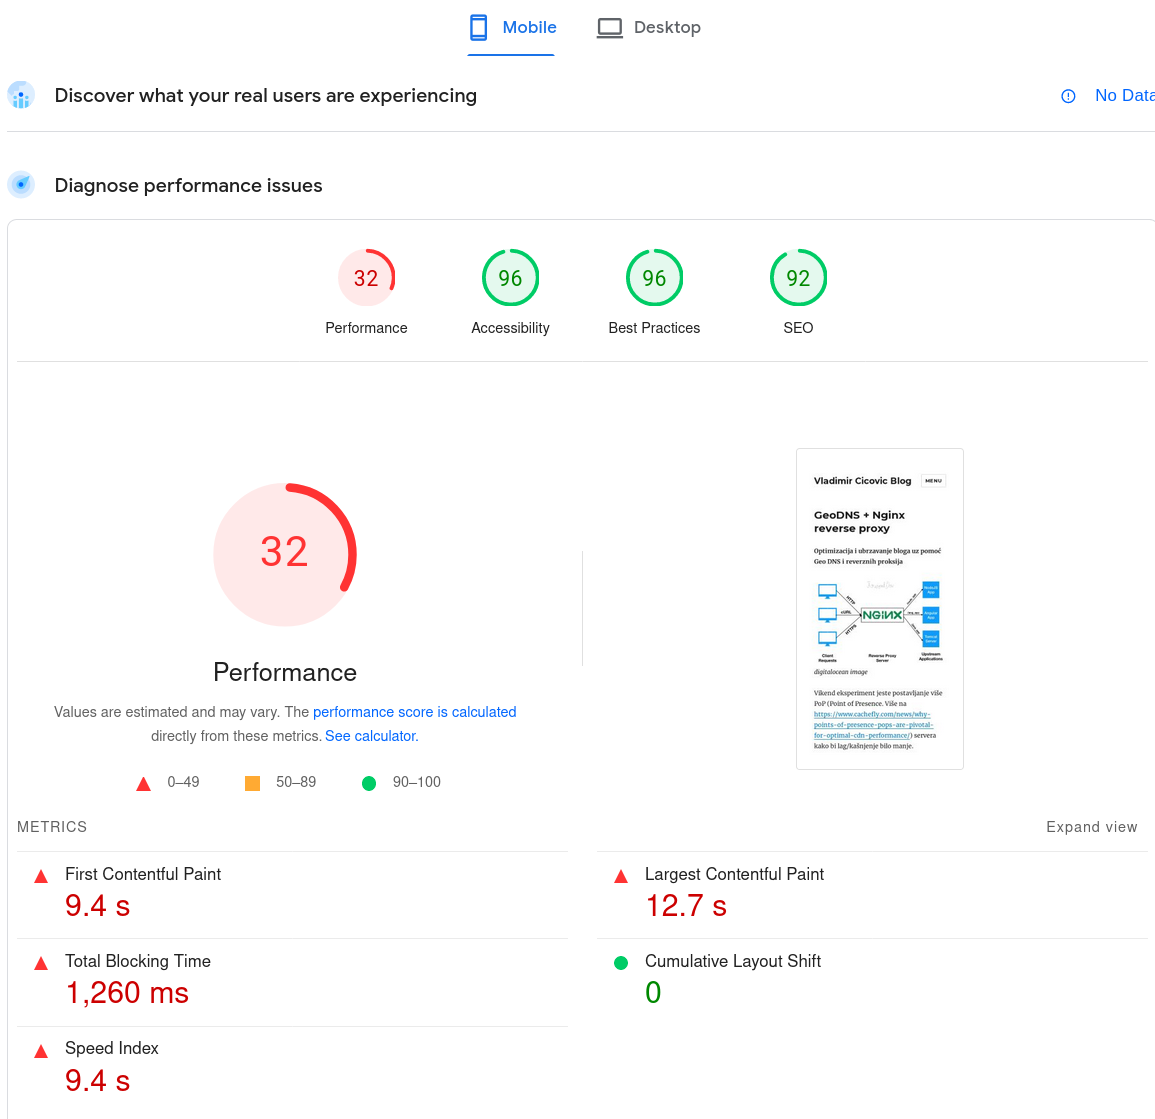
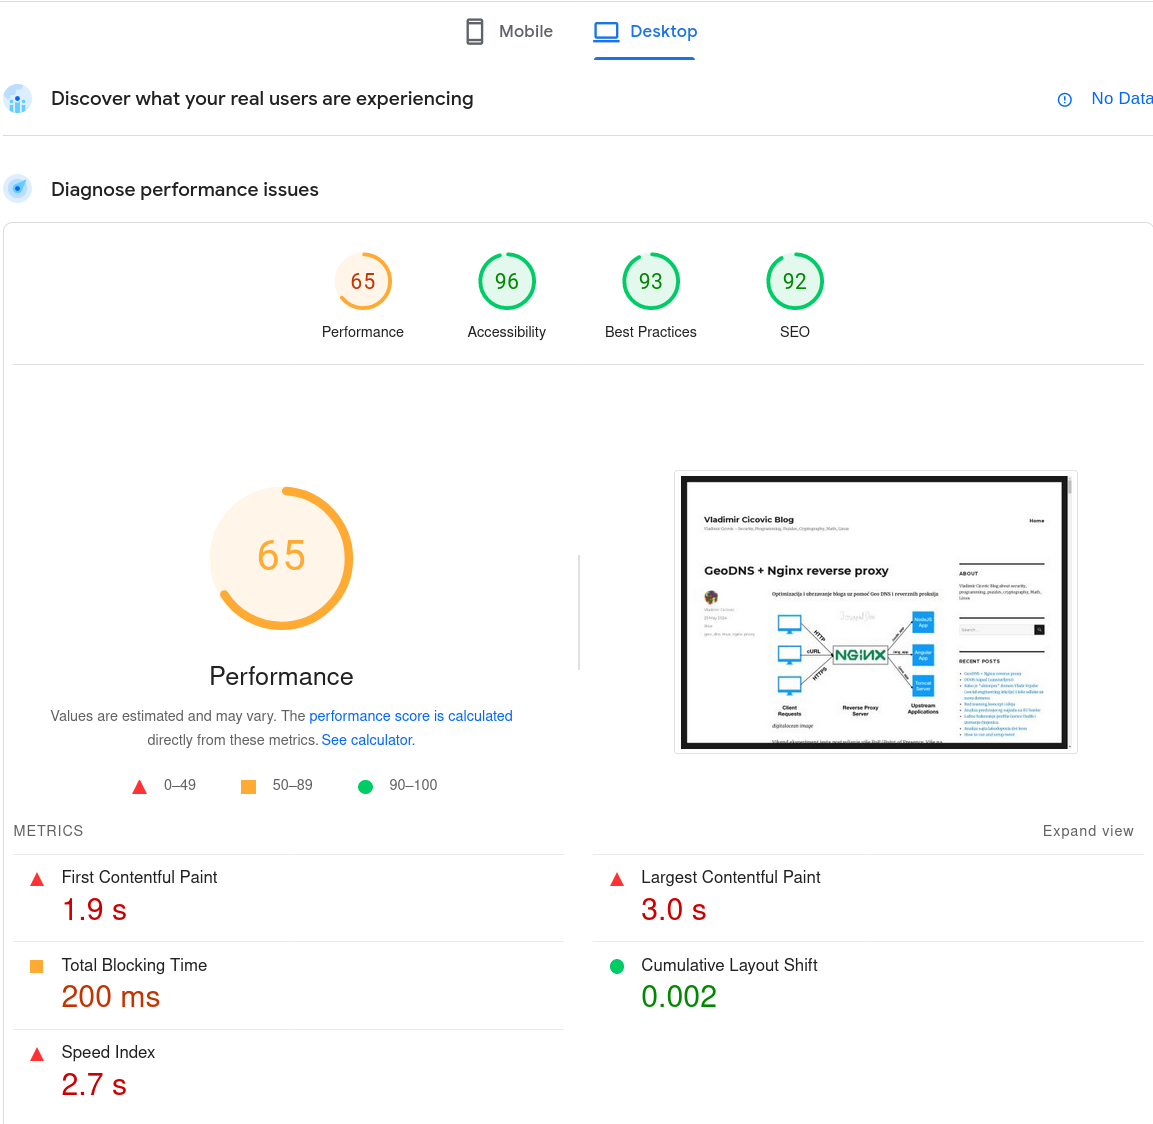
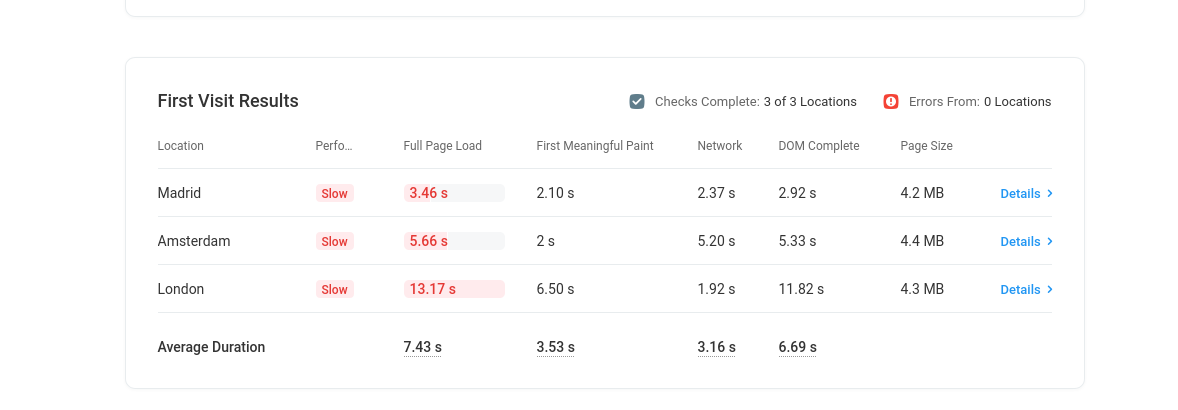 prije proxy servera
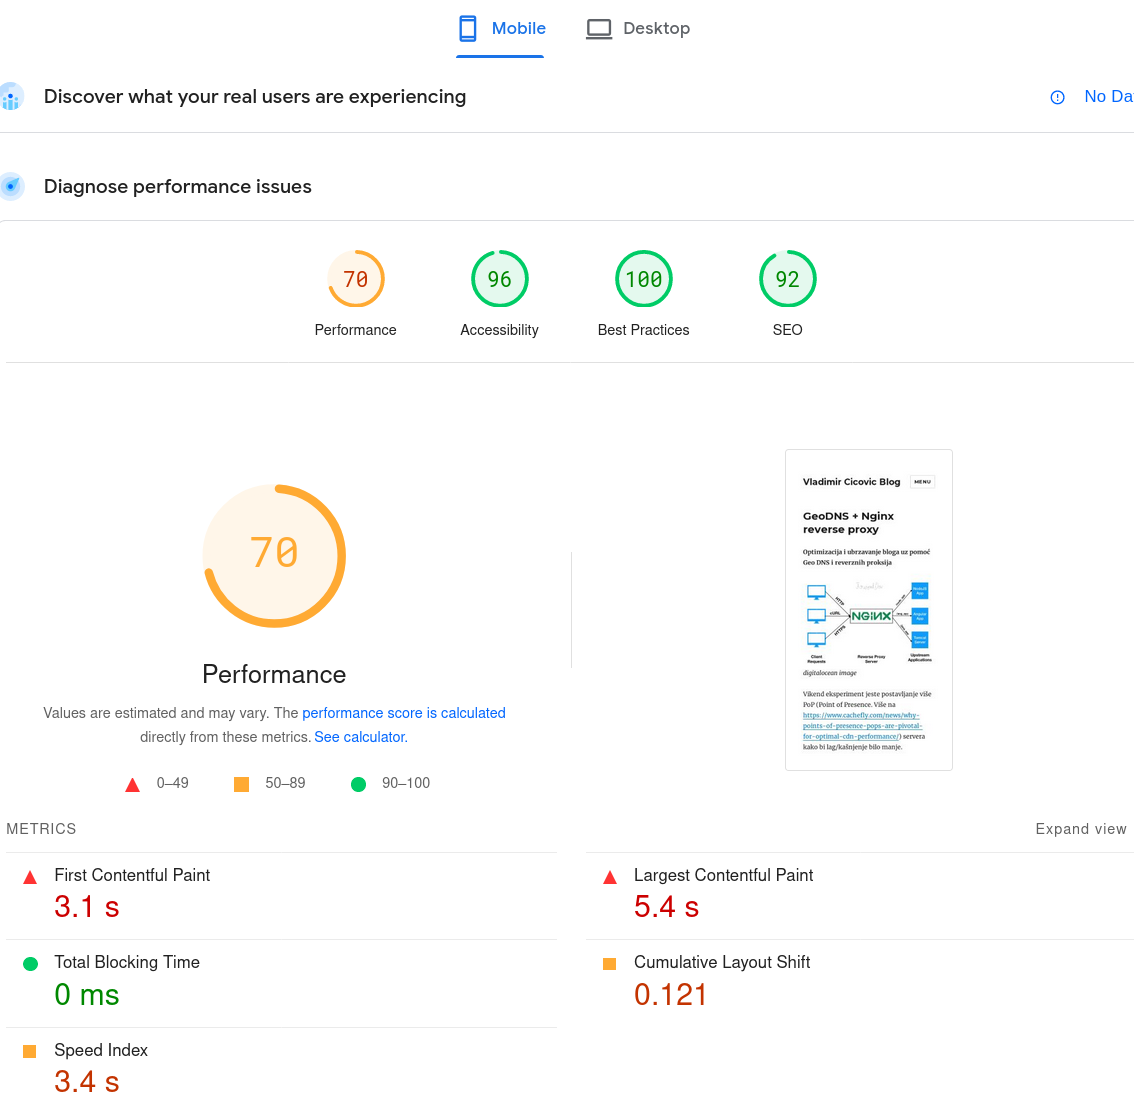
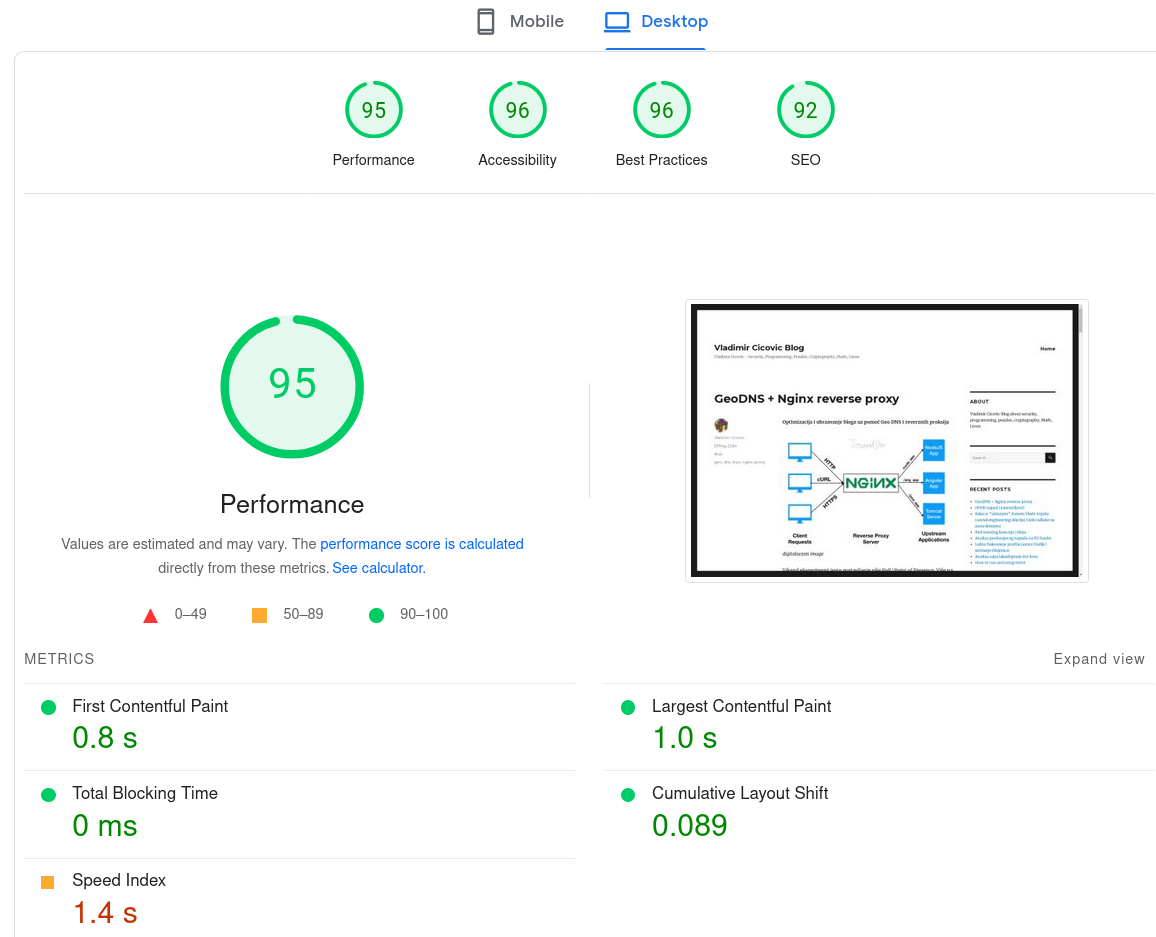
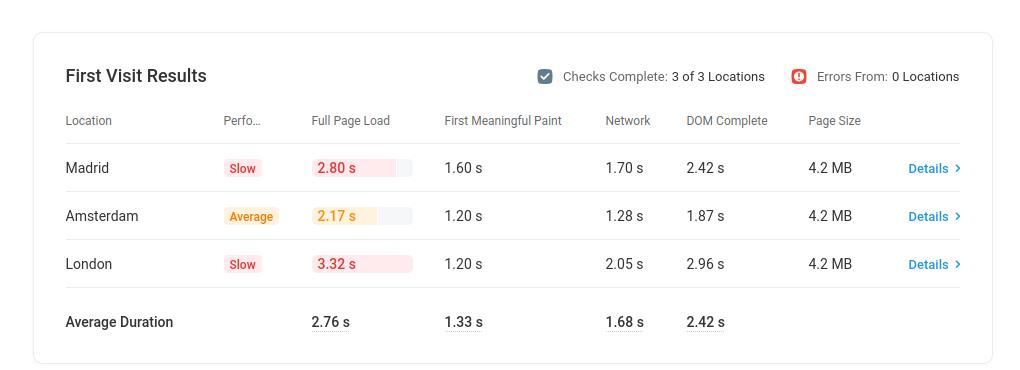 poslije dodavanja Geo DNS i reversnih proxy servera
Testiranje uz pomoc: https://www.dotcom-tools.com/website-speed-test
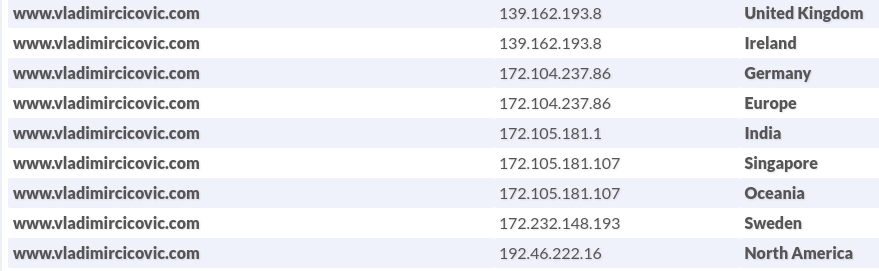
Geo DNS Pool
Koraci koje trebamo uraditi su sljedeći:
- Kreirati bazni reverse Nginx proxy
- Klonirati na različite lokacije
- Testirati uz pomoć Curl-a
- Podesiti GeoDNS na EasyDNS
- Testirati DNS propagaciju i web prisutnost
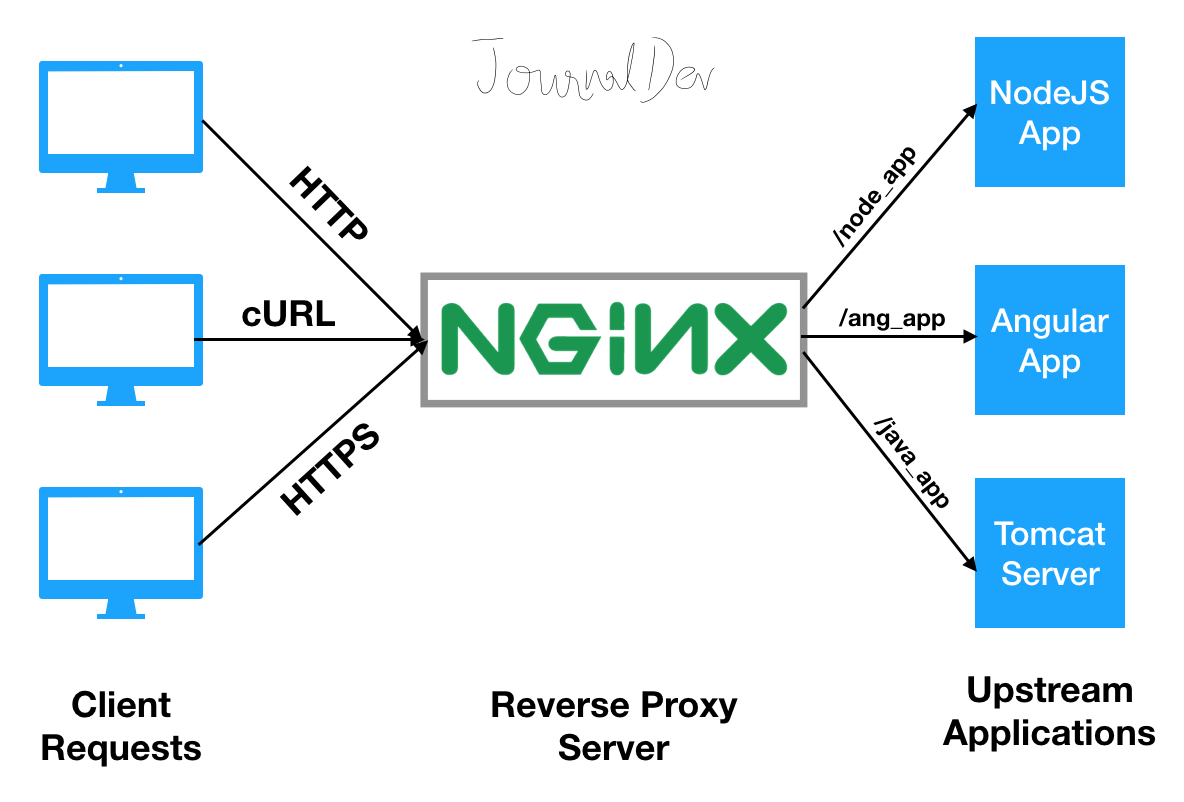
Nginx reverse proxy
Konfiguracija za revezni proxy (neću davati druge nepotrebne informacije):
http {

   # putanja za /cache mora biti kreirana i podešena za nginx usera/grupu www-data

   # levels - do kojeg nivoa će ići poddirektorijumi za kesiranje

  # Broj objekata koje će sačuvati u kešu - 10m

  # maksimalna veličina fajla koji može biti keširan - 1g

proxy_cache_path /cache levels=1:2 keys_zone=m_cache:10m max_size=1g;

   server {

           location / {

                proxy_cache m_cache;

                proxy_cache_valid 200 302 120m;
                # vremenski koliko dugo - 120 minuta

                proxy_cache_valid 404 1m;

                proxy_pass https://9.8.7.1;
                # ovdje je 9.8.7.1 izvorni sajt

             }

}
Kako testirati da li je proxy podešen
Ako imamo Linux komandnu liniju onda izvršite komandu:
curl -H "host: www.vladimircicovic.com" -k https://172.232.148.193/
Ovdje koristimo host header i IP adresu gdje Curl upucujemo da ignorise SSL/TLS sertifikat i validnost (porediće IP adresu i domenu u SSL sertifikatu, i zatim odbiti da pošalje zahtjev, zato dodajemo -k opciju)
Sa ovom komandom bi trebalo da vidimo početnu stranicu.
Kako testirati DNS za odredjene zemlje
Jedan od bržih načina da se vidi DNS propagacija (https://www.digicert.com/faq/dns/what-is-dns-propagation) jeste sajt: https://dnschecker.org/#A/www.vladimircicovic.com
Drugi način ako imate Linux komandnu liniju:
dig +short A www.vladimircicovic.com @118.127.62.178

172.105.181.107
Gdje je javni DNS server za Australiju dostupan sa: https://public-dns.info/nameserver/au.html
IP adresa 172.105.181.107 je za Australiju i druge zemlje Okeanije.
Kako testirati web pristup za odredjene zemlje
Najbolje je uz pomoć sajta https://www.dotcom-tools.com/website-speed-test ali postoje i slični gdje je moguće testirati.
Optimizacija web stranice i ograničavanje sadržaja radi bržeg učitavanja
Npr možete prikazati 5, 10 zadnjih postova na svom sajtu. Tako učitavanje bude jako teško za klijenta.
Jedan od načina jeste ograničavanjem količine broja postova na prvoj strani.
Alat za testiranje: https://pagespeed.web.dev/
Prije ograničavanja sadržaja:
Poslije ograničavanja sadržaja:
 Solution for Bucharest
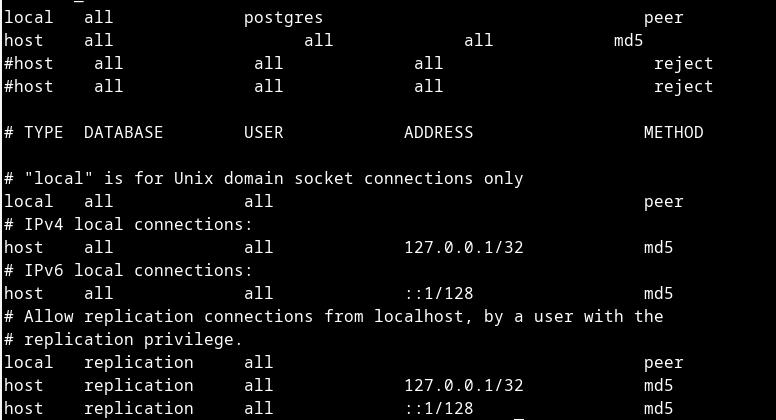
 Famous port knocking with nmap tool
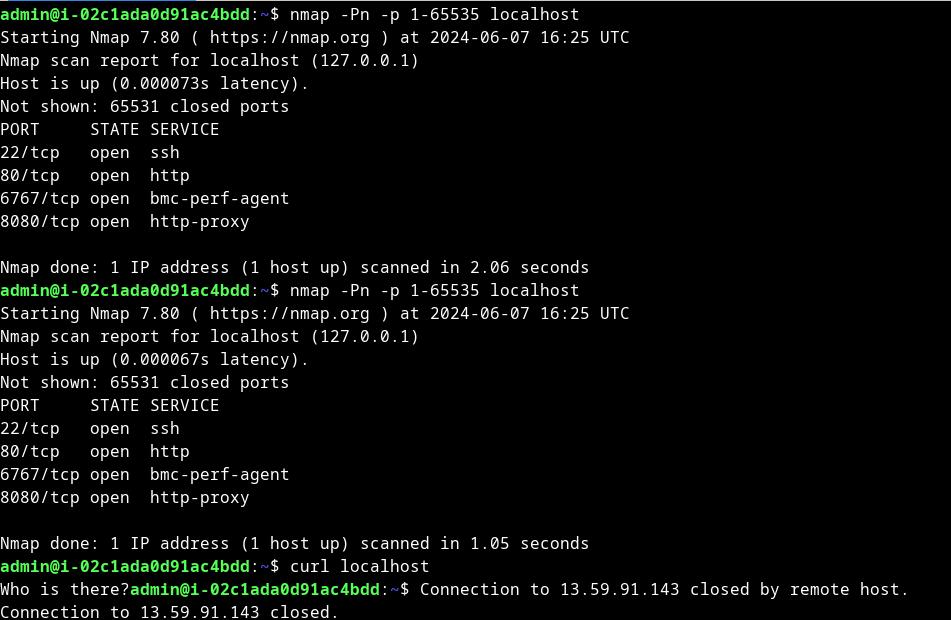
 Killer name
 Count of IPs from access log
 Kubernetes map - from cloudsigma.com